Wednesday, February 7, 2018

LEGO Technic Build (Contraptions) - Page 196, Build #99

Clarification - Yoshihito Isogawa has multiple books and the books I'm using in the LEGO Technic Builds are: 
  • The LEGO Power Functions Idea Book, Machines and Mechanisms
  • The LEGO Power Functions Idea Book, Cars and Contraptions
Today, I'm going to build a two-legged walker from the Cars and Contraptions book.

This one was the first in the series, and I thought it would be relatively easy, but I made a simple mistake, and it took me a long time to rework everything to make it work. So, good luck!


This is what I'm building today.


Parts I'm going to use today. I had to find replacements for certain parts because I didn't have them or enough of them. As long as they function alike, it's fine.


Building the legs1.


Building the legs2.


The drive mechanism.


Following are the pictures of the drive mechanism. I tried to give you some various viewpoints.


Legs attached.


I thought I could build this in a short time, but I got a couple of parts mixed up, and it took a little longer to complete. 

I think it'll be really neat to attach a Mindstorm to it, so if I get that figured out, I'll post that, too.

Have a great day!


Tuesday, February 6, 2018

Terrific Toys - Ticket to Ride

I LOVE this game!


Our first purchase was the Ticket to Ride Europe (which is the 2nd installment in the Ticket to Ride Series of games). A couple of years ago, I was looking for a Christmas present for a boy who has too many books, videogames, nerf guns, LEGOs, board games, etc. Too many of everything. 

More importantly, I wanted to find a toy or a game that will encourage more family time when I came across this game in a local Target store.

The online description of the game states "From the craggy hillsides of Edinburgh to the sunlit docks of Constantinople, from the dusty alleys of Pamplona to a windswept station in Berlin, Ticket to Ride Europe takes you on an exciting train adventure through the great cities of turn-of-the-century Europe."

And the goal of the game is collect cards of various types of train cars that allow the players to claim railway routes connecting cities in various countries around the world. At the end of the game, extra 10 points are awarded to the player with:

  1. The longest railway route.
  2. The most number of routes completed.

BUT it's so much more.

Although the game is recommended for 8+, it's quite reasonable for younger kids, 6+ kids, to play with the rest of the family. The best thing about this game is that it's fun for all ages, adults, and kids. Quite often, when I find a game that's fun for the kids, it's not as engaging for the adults. This game will keep everyone engaged and competing until the very end.

This game supposedly takes between 30 - 60 minutes, but we usually take about 90 min to finish because, we've changed the rules, a bit. BUT, you can stop at any time. If you don't like long games, just set a time limit, and stop. Then just tally up the points and declare a winner. 

Did I mention that it's VERY strategic game? And the unexpected strategies your children come up with to win the game could floor you, too. This game allows room for all kinds of creative strategies. 


As seen on the top of the blog, I've added to my Ticket to Ride collection, and each of them add another element to the game. I'll blog about them in the future.


Friday, February 2, 2018

Birds of PLAY

This was in the Make magazine a couple of years ago, and when we were participating in the Tech Challenge 2016, Taking Flight, we made these gliders to prototype (we thought using the gliders in the shape of birds would be fun at the competition) and understand the mechanics of flight.

I don’t quite remember what the instructions were except that we drew gliders in the shape of birds on a foam plate and experimented with different combination of shapes in gliders and tails.

This is a great project you can do with your children/students inexpensively. I hope you try this project and have a lot of fun.

List of Supplies:
  • Foam plates
  • Paper clips
  • Scissors
  • Adhesive tape (optional)
  • Pens or Pencils

Build Instructions:

There is no perfect shape to start off. Experiment with the size and width of wings to find your best design.


As you can see, I have four different shapes and five different tails. The gliders are identified with letters in the back, just like the tails are identified with numbers.


The gliders are "lettered" to find the best combination of shapes and tails.


Gliders are assembled. Ready for flight testing.


I put aielerons on this right, bottom glider to see if they made any difference, but they didn't. In fact, it didn't fly as well as the one above it (which is basically the same glider design except for the aielerons)


Again, with 4 different shapes and 5 different tails, you can have a lot of fun flying them and figuring out which combination works the best. 

In these videos below, I've recorded two different combinations which flew the best. Enjoy & have fun!


Glider B, Tail 2 combination


Glider D, Tail 5 combination

Find your own best combination and have fun with Birds of PLAY!

Hint: DON'T try to throw these. Just hold them by the tail area (without skewing the tail position), and let go gently.


Thursday, February 1, 2018

February 2018 The Tech Challenge Update

I LOVE this program.

My children and I have been participating in the Tech Challenge since 2013, and after five years, we're taking a break this year. However, I'm thinking about participating as a volunteer this year.

This year's challenge is called Drop & Dash.

The Tech Challenge 2018:  Imagine you’re at the top of a mountain. Or a cliff. Or a building. You need to get your supplies to a location at the bottom and up a hill. You’re all ready to go when you find …
Your batteries are dead.
You can’t scrap the mission. So what do you do?
The challenge: Design and build a device to survive a drop and deliver supplies. No batteries allowed!
The best part? It's not too late to participate. 
Registration is open until 3/31/2018. 
Info session/advisor training/team workshop are still available on 2/3/2018.

This year's competition is on 4/28 and 4/29.

And on the competition day, everyone can visit the Tech Museum for FREE.

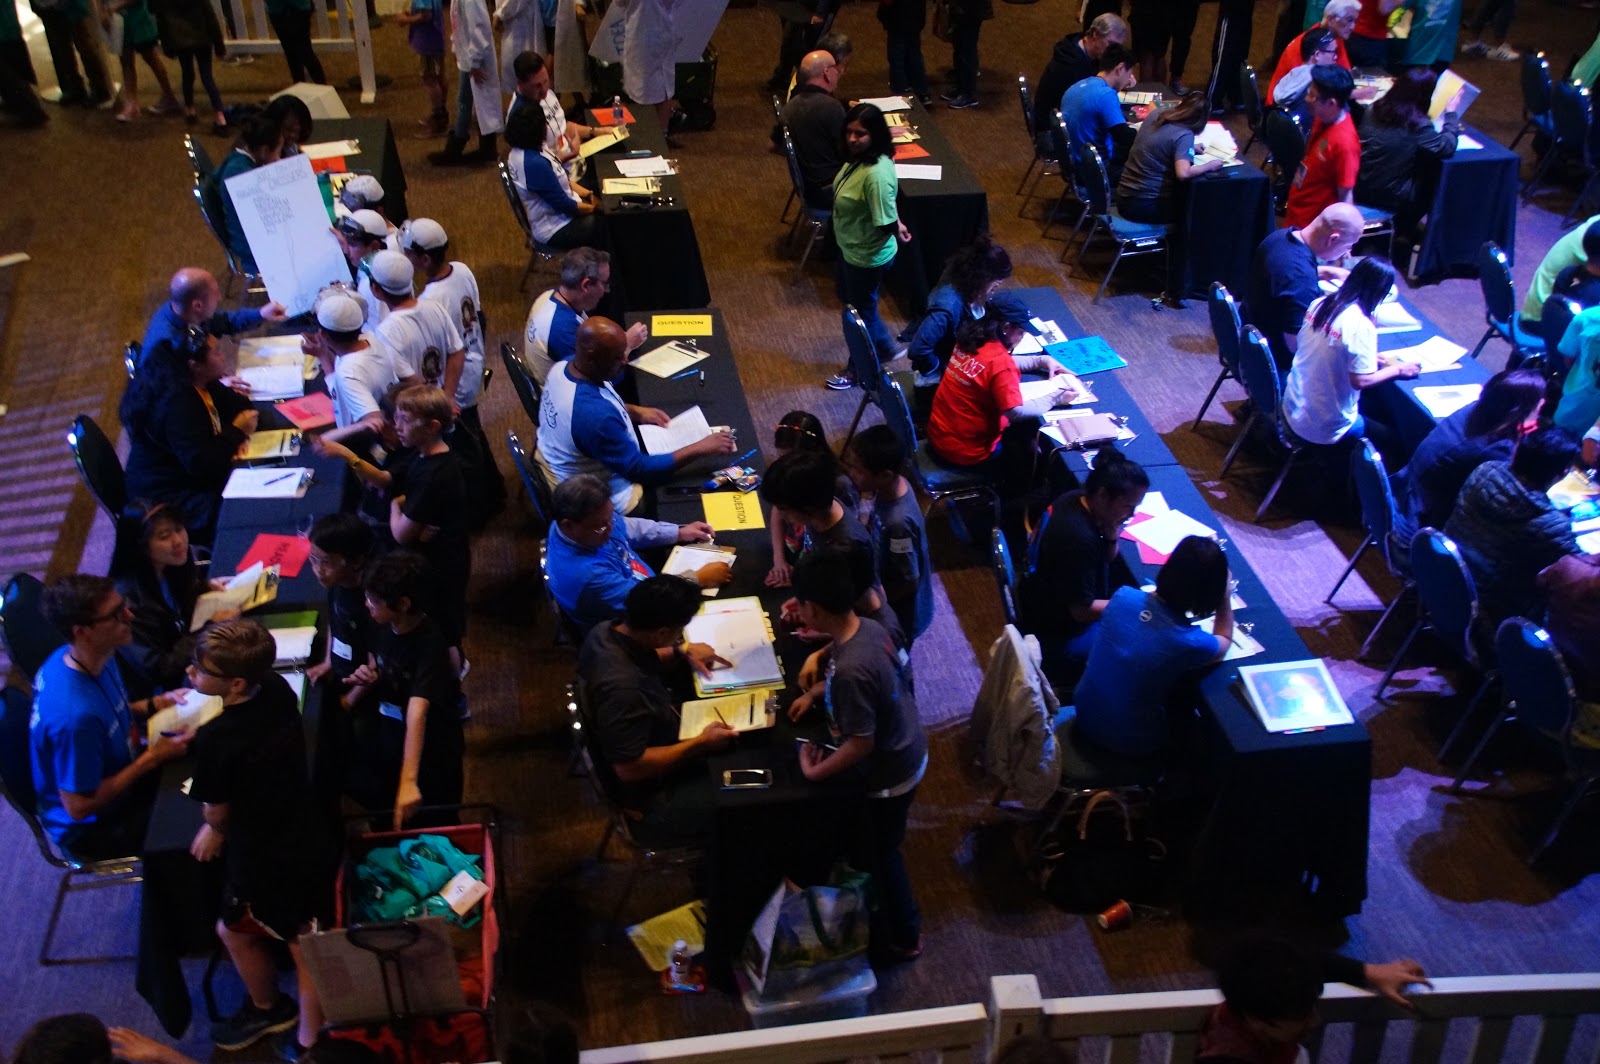
Here are some pictures from LAST year's competition:


After a long day of test trials.


We went with several prototypes.


In the Pit on the Competition Day.


Engineering Design Interview.


Device Performance.


Award Ceremony.


Engineering Design Interview for another team.


Device Performance.


Wednesday, January 31, 2018

Roaring Roller Coasters

This is a project I do almost every year because the students have so much fun. 

The premise of the project is that there is a competition, sponsored by the premiere roller coaster company E2, Extreme Experience, to see which team can build the greatest roller coaster for E2’s next project. 

The rules of the project are: 
  1. The roller coaster must have at least one loop.
  1. The ride should be thrilling (extra points for speed).
The tree different marbles represent three different types of roller coaster cars – empty (wooden), half-full (glass marble) and full (metal ball bearing).

The roller coaster design must support all three types of cars. After a run, all three types of marbles must fall/fly into a target cup. Rolling into a cup on the ground does not count.

List of Supplies:
¾” diameter piping insulation (can be purchased from any hardware store)
½” diameter ball bearing, metal
½” wooden marble
½” glass marble
Plastic cups
Adhesive tape
Anything else you have on-hand to build a support structure


First build. This was extremely accurate roller coaster.


Second build for the team that executed the roller coaster above. A team must have two loops after they complete their initial run, and this was an ambition design.


This team used the existing space very, very well.


This team put in two loops to start.


A very interesting use of a classroom furniture.


Another example of students being very creative.


An innovative support structure.


Monday, January 29, 2018

LEGO Technic Build (Mechanisms) - Page 142, Build #182

I am a lover of LEGO, and I bought a book, The LEGO Power Functions Idea Book by Yoshihito Isogawa last fall.

Initially, I thought I'd use the book to build with my daughter and nephews. However, I soon realized that even though my daughter and nephews are advanced LEGO builders for their age, they were still having some problems building the more sophisticated machines and mechanism because there were only a few photos accompanying each build.

So, I decided to put together these step-by-step building process for my nephews who live farther away than I like. So, this was the genesis for Building my way through a LEGO Power Functions Book section in my blog.

I'm going to build the machines and mechanisms that are visually interesting, and I'm going to skip around the book. So, I will note the page # as well as the build # in the book on each blog.

Today, I'm going to build a cam mechanism.

So, what is a cam?

A cam is a rotating machine, which transfers a oscillating or reciprocating motion to another part known as a follower. A really good example of a cam is a car engine.


I'm building this today.


Pieces I'm going to use today.


I bought two tubs of technic parts, and I didn't have a particular piece used in the book. So, I chose a piece that came close to it and used it.


A follower is already done.


A follower taken apart.


Building the cam.


Attachments to attach the gears.


Gears attached with the follower on top. Cam pieces off to the side.


Cam pieces attached.


My power functions set came from a $99 LEGO Technic set, but you can purchase a similar power functions set for ~$30.


A short video of the cam working. Enjoy!


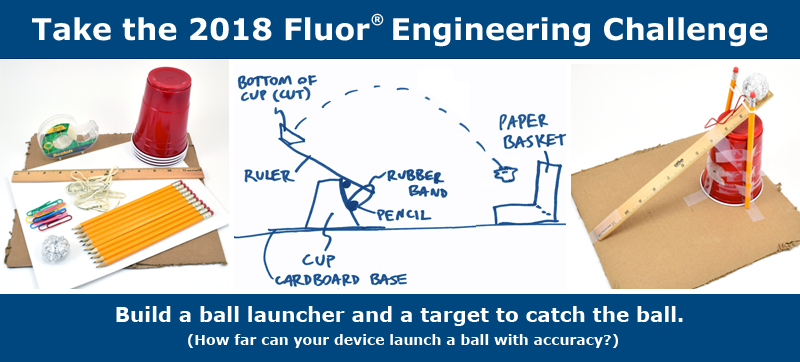
Take the 2018 Fluor Engineering Challenge!

I became aware of this competition a little over a year ago (2017 challenge, which was different from this one) when I was perusing the sciencebuddies.com site. I thought it was interesting and tried it with my daughter's class along with a few other classes.

Though the teachers and I were concerned about spilling water in class on the carpet (yes, last year's project involved a tub of water), it wasn’t too bad. And the project was great! The students learned a lot, but more importantly, they had fun figuring things out for themselves.

Year after year, this Flour Engineering Challenge is just plain fun. But best of all, it gives your children opportunities to win money for their school.

2018 Fluor Engineering Challenge


The objective of the 2018 Fluor Engineering Challenge is to use limited materials to build one device (the launcher) that launches an aluminum foil ball and another device (the receiver) that catches the ball. The farther your ball flies before being successfully caught by the receiver, the more points you get. 

Your children can use only a limited list of materials, and there are points associated with each item. The less material your children use, the more points they keep.

List of Materials (see website for more detail description):
Corrugated cardboard base
Large paper or plastic cups
Wooden rulers
Paper
Wooden pencils
Rubber bands
Large paper clips
Roll of adhesive tape

2018 Flour Engineering Challenge Website

Challenge objective & info

In mid-February, I’m planning to do this project at a local elementary school. I’ll share the results with you afterwards.


Have fun!