Showing posts with label Physics Science Project. Show all posts

Thursday, May 10, 2018

Catapult Hack-a-thon!

This is a project I picked up from RAFT in San Jose. This would have been a good project on its own, but I wanted to challenge my 6th graders. So, for the first ten minutes, I have the students quickly put this kit together. Then we spent the rest of the class period hacking it for distance and accuracy.


This is what the students built in the beginning.


Supplies List:
  • 1 binder side or a cardboard the size of a binder 
  • 7 unsharpened pencils
  • 2 binder clips
  • 1 soft pompom ball
  • 1 plastic spoon
  • 1 rubber band
  • 1 pencil top eraser
  • 5 rubber tubes with a hole in the middle
  • 1 rubber tube
Build Instructions:
As I said, I built the catapult then left as an example for the students to see and build. I also leave out the instruction pamphlet for them.

Once they build the catapult, they come up to the line and shoot it to see how it flies. Then the students are instructed to "hack" the catapult. The students are encouraged to do anything they want to it, except they can't cut the rubber tubes and break the pencils.

And these are what the students came up with (I didn't add all 4 classes of modifications).


The best of the best! (see below)
This design was so awesome that this design gave me goosebumps!

1st hack attempt. This didn't shoot as far as the team had hoped.


The final hack!
Closed. At rest position.


Fully armed.
Ready for a shot.
Fun group photos:


Wednesday, January 31, 2018

Roaring Roller Coasters

This is a project I do almost every year because the students have so much fun. 

The premise of the project is that there is a competition, sponsored by the premiere roller coaster company E2, Extreme Experience, to see which team can build the greatest roller coaster for E2’s next project. 

The rules of the project are: 
  1. The roller coaster must have at least one loop.
  1. The ride should be thrilling (extra points for speed).
The tree different marbles represent three different types of roller coaster cars – empty (wooden), half-full (glass marble) and full (metal ball bearing).

The roller coaster design must support all three types of cars. After a run, all three types of marbles must fall/fly into a target cup. Rolling into a cup on the ground does not count.

List of Supplies:
¾” diameter piping insulation (can be purchased from any hardware store)
½” diameter ball bearing, metal
½” wooden marble
½” glass marble
Plastic cups
Adhesive tape
Anything else you have on-hand to build a support structure


First build. This was extremely accurate roller coaster.


Second build for the team that executed the roller coaster above. A team must have two loops after they complete their initial run, and this was an ambition design.


This team used the existing space very, very well.


This team put in two loops to start.


A very interesting use of a classroom furniture.


Another example of students being very creative.


An innovative support structure.


Monday, July 13, 2015

Air-powered vehicle, Part 2 - How to make a vehicle

Two years ago, I spent 26+ hours prepping a rubber band drag racer for a 4th grade class science project (my guinea pig class), and it was a complete BUST! Even after I worked out the kinks, unforeseen issues came up and things didn't go smoothly. After spending 1 1/2 hours in class, kids were very disappointed with the result (imagine my frustration!). 

After that project, I have a general rule of spending two to three hours to try it out, and if it doesn't work, I go on to another. Well, this one, I tried building a prototype with my daughter, and it went very well. I'm definitely going to use this project in the classroom this fall.


Prototype my daughter and I built the other day.
 As I said before, there are books/kits combo for this project on sale online, but it was cost-prohibitive for me. So, I came up with a more affordable alternative.

Supplies Needed:


  • Balloon
  • Rubber bands
  • Straws
  • Thin bamboo chopsticks (skewers, lollipop stick, etc. will work, too)
  • Ruler
  • Scotch tape
  • Masking tape
  • ~2" diameter circle maker
  • A piece of cardstock paper
  • Small screwdriver or awl
  • Something to cut chopsticks
  • Scissors
Project Instructions:
  • Step 1 - Tape together the two boxes from the Part 1 of this project and set them aside.


  • Step 2 - Trace and cut out the Six wheels with the holes for the axle in the center.


  • Step 3 - Mark and cut three axle casings to size (~1/2" wider than the vehicle body width). An axle should freely slide in the casing. 

  • Step 4 - Mark and cut three axles to size (~ 1" to 1 1/2" wider than the axle casing width). An axle should slide freely in the casing.


  • Step 5 - Assembling the "engine" of this vehicle.
  • Insert a straw into a balloon.
  • Put a rubber band around the neck of the balloon over the straw.
DO NOT tie the rubber band too tight. It can collapse the straw, and it won't work well (I've learned from experience). The bendy-side of the straw should be outside to direct the air flow.

  • Step 6 - Tape the axle casings on the bottom of the vehicle. Place rubber bands on the boxes. The orange box is the front-end of the vehicle, and the green box is the back-end of the vehicle. This rubber band configuration worked for me, but you can try others to keep the balloon and the straw in place.
  • Step 7 - Put the wheels on the axle. Surprisingly, this was the most difficult part of the project - sticking/taping/sliding wheels onto the axle. I wasn't satisfied with any of the processes of keeping the wheels on the axle, but all three ways work.
  • Step 8 - Affix balloon and straw on the top of the vehicle.
  • Step 9 - Blow the balloon and have a race!
Need a picture

In the process of building this vehicle for the blog and instructables.com, I built three.


I found it challenging to make the vehicle go straight. There were a lot of variables to consider, but the most important one is to make sure that the axle casing is taped on straight. Also, try tweaking the axle and flattening out or smoothing out wheels, but the results were mixed. I may have to tinker with this a little longer.

This project was a surprise because I expected it to take longer. But it didn't, and I was really happy with that. I could have cut out even more time by using a single serve cereal boxes or other smaller movie-sized candy boxes, but as I said, I wanted uniformity of sorts. But I'm not sure if I'm going to stick with making the boxes in classrooms because I only have 1 or 1 1/2 hours per project.


Thanks and have fun!


Monday, July 6, 2015

Air-powered vehicle, Part 1 - How to make a box (vehicle body)

This is what we are making.


But first, we must learn to make a box, first. OK. It seems a little odd that I should start off this project by teaching you have to make a box, but it will all make sense soon.


I saw a variation of this project in a science project kit/book combo. However, I can't afford to spend almost $17/student (since I collect $10/year/student), so I had to figure out a way to make it affordable.


The box will become the body of the vehicle. I can easily ask the students to bring a box for this project, but I want uniformity. So, we'll make a box.


Supplies Needed:


  • Two pieces of construction paper

Project Instructions:


  • Step 1 - Fold one corner of the construction paper.


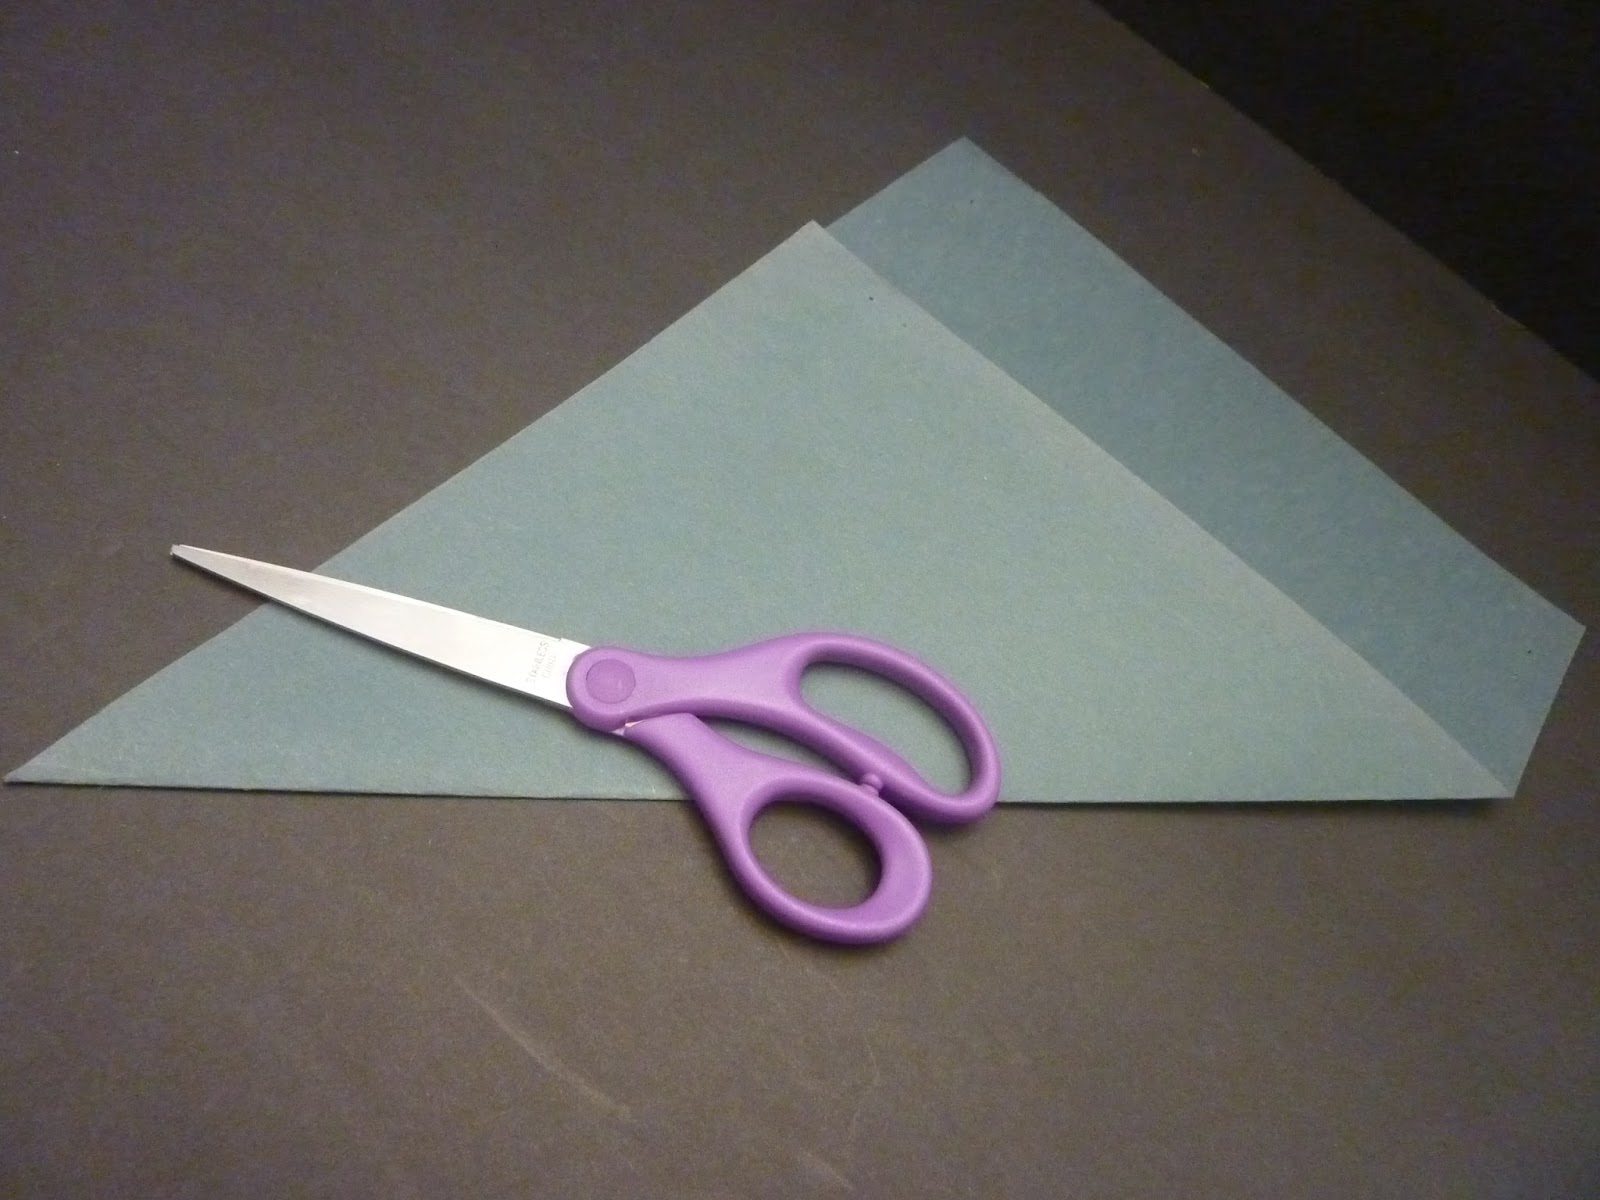
  • Step 2 - Cut out the excess and make a square.
  • Step 3 - Put the corners together and fold it in half to make a triangle. Fold the top of the triangle (pointy-end) toward the bottom of the triangle in half.
  • Step 4 - Fold it in half again.
  • Step 5 - This is what you get. Then repeat the folding process in the opposite direction.
  • Step 6 - Again, fold it in half, and then half, again to get this.
  • Step 7 - A square with folding grids.


  • Step 8 - Fold the opposite ends together to make a triangle. Then from the top of the triangle, make a cut two squares in from the pointy-end. Leave one square from the bottom of the triangle uncut.
  • Step 9 - Leave the pointy-end pieces alone, for now. 
    Then fold in the side pieces toward the center of the box. The box should be two squares wide and one square deep.


  • Then fold the pointy-end pieces over the folded pieces and tuck it under.


  • Step 10 - Complete! The lid of the box is done. 
  • Step 11 - Now for the box bottom, this piece needs to be a little smaller. Make the first square a little smaller and cut off the excess from one side.
  • Step 12 - Repeat Step 3 to Step 10 for the bottom of the box.


We'll need to make two boxes for this project. To inspire you, I've attached another photo of the finished project.


Make one (or two boxes) and have fun!